
I don’t stop and take pictures of this very often, but I had recently realized i haven’t gotten around to sharing my ideas of “Gorilla Mycology” and Fungal Wildcfrafting. Here is a pictorial tutorial to get you started on growing your own fungi in the wild.
Each time I go out in the woods to harvest the human share of fungi, I often find fungi that are less than choice. Rather than leave them to disperse their spores through the air, I have come up with a simple technique to increase inoculation, and speed along the recovery of our forests, luckily, this is just as easily done with edible fungi as any other fungal fruitbody, so you are creating food for you and other animals as well!
The technique is simple, and yields modest results. I have every single burr oak at a frisbee golf course in Terre Haute inoculated with maitake, as I once took an inedible floret of maitake and spread the love to the trees around. I’m sad that I’m going to miss my harvest this year. Of course, the trees might have already been inoculated, but I would like to think that from one year to the next, the large increase had something to do with our actions.
This is an activity that is to really be done out of the goodness of your heart, and to be done for the forest. You won’t make any money, and good luck trying to come up with any tangible results other than anecdotes. Now, with my techniques being off the hook, here are the photos and the techniques.
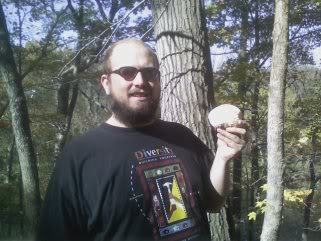
We will start off with this fine specimen of Hericum erinaceus. Well, it was mostly fine. The inside flesh of this two-in-one fruitbody was white as snow, making it a choice edible, but on top, there was a little rain damage. The flesh of hericum is spiny, and the entire surface is covered with spore pores. The flesh itself is covered in spores, and fungi flesh is often used itself to start colonies. My technique assumes the spores are viable, and that the flesh MAY also be viable as well. Each time I press the flesh against exposed heartwood, I make sure I’m doing it so ‘gill’ flesh (or in this case, spine flesh) and inner flesh are directly exposed to the heartwood.
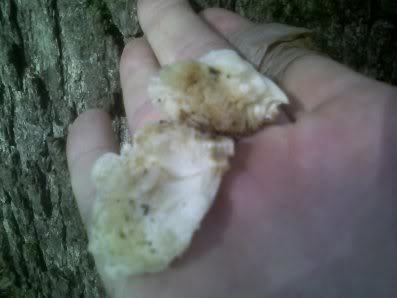
Of the choice fruitbody pictured above, I used this small handful for my inoculation techniques
It’s hard to say which will come first, the fruitbody or the spore, but surely, one or the other will start a mycelial net that will penetrate the heartwood and establish a colony. All hardwoods form ‘matrices’ of fungi, allowing for several fungi to living common with each other. Getting spores into the heartwood is a challenge, but the following photos will demonstrate what to look for, and key locations for inoculation. Of course, nothing beats spawn plugs and a drill, but this technique can be done in the forest mid-forage, with no tools and no forethought except for wanting to taste what the forest has to offer.
Many fungi, especially the higher fungi(macrofungi) that we eat, can be symbiotically mycorhizal, weakly saprophytic, strongly saprophytic, and scientists are even discovering macrofungi behaving like endophytic fungi.
I believe one’s best shot at wildcrafting fungi is to inoculate the same species as which you found your fruitbody. This organism is already accustomed to the climate and particular nutrients of that species, and it just makes the most rational sense.
The first technique I will demonstrate is mycorhizal inoculation. This technique probably has the least amount of success, and will produce few fungi, especially with the test subject. However, I think it is still worth giving it a shot. If the fungi can survive in the soil-root complex, then we are bringing health and wealth to the forest, if not to ourselves. Mycorhizal relationships build soil and tree health, and they spread easily once a species weaves itself into the matrices. I choose to inoculate the Quercus Velutina(Black Oak) in areas that did not seem to have heavy mycological traffic. Determining such a variable would be the subject on an entirely new book, but let’s just say for now, where I didn’t see any mushrooms.

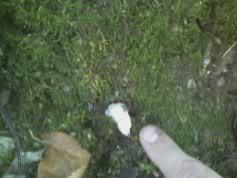
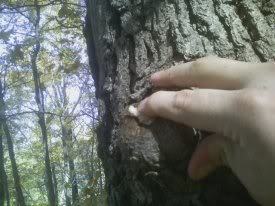
Here I use my finger to uncover a rootlet that has ‘died’. This rootlet has access to the heartwood, and is a choice candidate for inoculation. What can’t be seen in this photo is the top of the wedge in the split of the rootlet that I am working the spore-flesh into. I recovered this rootlet with moss, in hopes that the new mycelium will work its way up the heartwood, and into the soil, hopefully allying itself with the surrounding Velutina saplings in a few seasons.
Here is a photo of me working some myelium straight into the moss, hoping to increase the density of inoculation
I’ll cover this spot right up against the tree with the moss once I’ve worked into the soil, and around live rootlets. I scrape them with my fingernail that has had sporeflesh worked into it, hoping to catch an endophytic inoculation or two.
These are the most two experimental techniques, with the most difficultly in showing ‘results’ for the work done. The inoculations all occurred during the just-waning moon, in hopes of ensuring minimal insect and weather interference. This was last Saturday, the 27th, so the inoculation should have occurred already, if it has happened at all. I also performed this technique on the Northern side of the trunks, and placed pawpaw leaves above the moss to ward off insects from feasting. Judging my the lack of insects in the fruiting bodies we saw, I think we chose a great time. The just-waning moon is a good time to plant in biodynamic techniques because it is when the insect cycle is waning, as well.
The second-best chance for inoculating the forest is attempting weakly saprophytic relationships. In this case, the mycelium protects the heartwood from more serious disease, like sudden oak disease(which we did see present at Mounds State Park), in exchange for building a colony in the heartwood, and having premium access to the xylem and phloem when the tree expires or is struck down.
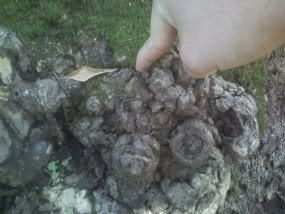
First, I found pre-tree knots where the woods was still dying. when these pieces are broken off, you will have an opportunity to press the fungal sporeflesh directly into the heartwood, before it fully heals itself. Here is an example:
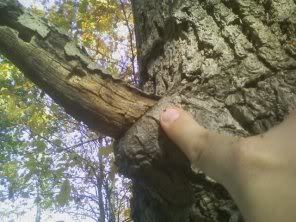
There are a few things going on here that would be fun for a games sake, but would hold up this tutorial. One, this branch has already been inoculated with a brown-rot fungus (cubical rot) Second, that brown rot(lignin eater) has been harvested by insects, most likely an arthropod. Thirdly, there are cubical holes where a woodpecker has eaten out the eggs of the arthropod colony. All that was left was evidence, all three players have left, and since this piece of wood is now ready to fall to the ground and be digested by the more voracious cellulose eaters(white rots, like hericum). Isn’t micro-tracking fun?
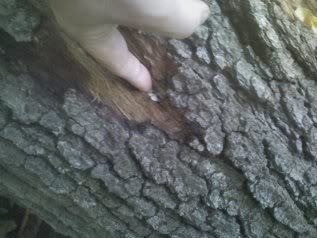
Here I am working the sporeflesh into the remaining exposed part of the wound. I take bark chips and try and cover up the exposed flesh, but I’m sure I’ve got an inoculation here, and I’m looking forward to coming back to this spot in a couple of years to harvest what I imagine will be a huge fruitbody, because fruitbodies are relative to the size of their colony, and there is a good chance this tree has been uninoculated, until now, by a higher fungi.
One aspect of mycorestoration, the umbrella under which Gorilla Mycology falls, that I haven’t discussed yet, is disease control. Weak saprophytes come in very hand for this job. Here is a first-time ever attempt on my part to try a little disease control
Here I cut a piece of this ‘cancerous’ tree tissue (which, is most like in fact, another fungi), and work my sporeflesh into it’s lesions. I’ll keep an eye on this, and start more experiments as the years go by on this tantalizing technique of curing trees, instead of cutting them down, to prevent disease.
Lastly, this is the most surefire technique to produce mushrooms in the coming years. Fallen trees, form the day their heartwood is exposed, begin to collect spores, and matrices begin to sort themselves out. In healthy forests, you’ll se entire complexes of fungi on each fallen log. There are three things you need to watch out for, to make sure your effort is a success.
First of all, wood that has cubical rot could still be inoculated, but for any wood to show signs of cubical rot means it has already passed it’s prime, as only the Chicken-of-the-Woods (Laetiporus Sulphureus) of the edible is a brown rot, they are key in any succession matrix you may attempt, which I will discuss later. There is still a lot of cellulose for fungi to unlock and process for food, and cubical rot wood can be used in sterile techniques.
White rot is when the wood of the tree looks stringy, this is the leftover lignin that the fungi have left behind. There is little nutrition left for most macrofungi, and should be passed over. Give your hand inoculation technique a try on this type of rot if you are experimenting with the Laetiporus.
Black rot is not a fungal rot at all or a term that has been used anywhere else but here, but is important to recognize in this process. This is where bacteria has overtaken a mycelium midstream, and is able to get sugar from the half-rotted wood. You see a lot of black rot in fallen logs that touch the ground totall on one side. needless to say it would be fruitless to attempt to inoculate wood with this type of rot. Usually, the bark sloughs off rapidly, and while black when wet, look a bit like white rot, without the peeling strands of lignin, when dry.
Having recognized the three main types of rot, locate a freshly fallen tree, in the 35-75 year old range. These should have only modest inoculations, and non-native mycelial mats have a better chance, than in older, more well-established matrices.
Here, I work the remaining fruitbody into freshly-split heartwood
I use my finger to get started, but realize I’m not making great contact, so I use a piece of wood to wedge it in, and then leave the wedge in to protect the jevenile mycelium

I did this several times on this log, and by next fall, I expect my hiking partners (I’ll be in New Orleans) will be collecting fungi from this spot.
This concludes the tutorial as far as the pictures are concerned, and what I was able to accomplish in one day with no tools, other than a stick, my hands, and a cameraphone. There are a few other techniques that I will explore in the future, like making a spore slurry in a squirt bottle on Friday, and spraying active culture mycelieum throughout the woods on Sunday.
Of course, I almost forgot, the finished product! This here is land-scallop salad, with oyster mushrooms, roasted squash and sunflower seeds, wild greens, garden tomatoes, and the only processed food, swiss cheese. A little vinegrette made this faux-seafood lunch a delight!
Lunch Time!

Thanks for listening, I will do my best to answer any questions you might have regarding this technique or my tutorial.
